
| Related Topics: | ||
You can save your settings in the Diagram Style window as a skin so that you can reuse them quickly and easily.

To save a skin, once you have specified the desired settings on all pages of the window, click the Save as Skin icon in the Skin field at the bottom of the window. Enter a name for the skin and click OK.
Tip: Skins are stored on your computer at C:\Users\Public\Documents\ReliaSoft\Skins.
To apply a skin to a diagram, click the Select Skin icon, choose the skin from the list in the Select Skin window and click OK. The name of the selected skin will be displayed in the lower left corner of the Diagram Style window. When you click OK to close the Diagram Style window, the skin will be applied to the diagram.
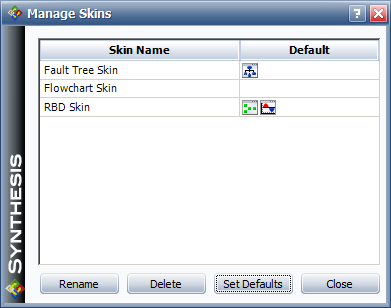
To view all of the skins (for all types of diagrams) that are available on this computer, click the Manage Skins icon.

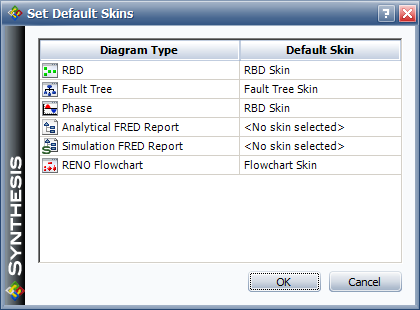
In this window, you can rename or delete existing skins. You can also choose which skin will be used by default for each new diagram you create. To set the defaults, click the Set Defaults button.

For each diagram or report type, click inside the Default Skin column and choose a skin from the drop-down list. When you set a skin as the default for an item type, an icon representing that item type will appear in the Default column for the skin in the Skin Manager.
The Skin Manager can also be accessed from the Display page of the Application Setup window.
Note: The skins managed here are diagram skins, which control the default appearance of new diagrams. The software also offers skins that control the overall appearance of the interface. These skins can be managed via the Synthesis Setup.
© 1992-2015. ReliaSoft Corporation. ALL RIGHTS RESERVED.