
| Related Topics: | ||
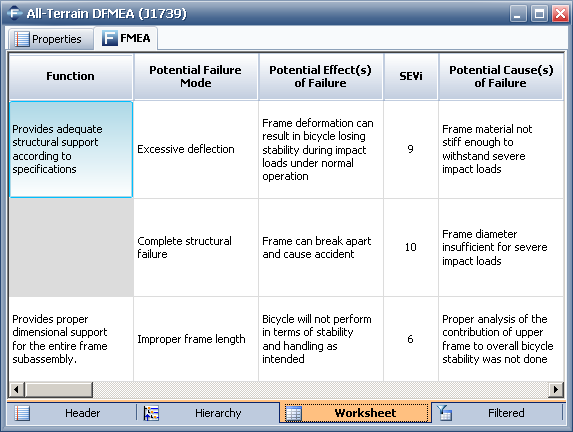
To view the FMEA in a tabular format, click the Worksheet tab at the bottom of the Analysis panel.
The FMEA worksheet presents a column for each data field that has been enabled in the interface style for the project. Pointing to a column header in the worksheet displays descriptive information about the column in a tooltip form. These tooltips also depend on the interface style settings that have been defined for the current project.
Note: Regardless of your choice of the FMEA structure for the hierarchy, the order of the columns in the worksheet depends on the order set in the Worksheet Columns page of the project's interface style.

You can split the worksheet view, creating two areas that scroll separately. This feature allows you to view text at one side of the worksheet without losing sight of text at the other side. To insert a split bar, right-click a column header and choose Split. The split will be inserted to the left of the selected column. To remove the split bar, right-click again and choose Remove Split.
You can resize the columns and rearrange the order in which the columns are displayed. You also have the option to select whether the worksheet will display controls in two columns based on type (e.g., detection controls and prevention controls) or will display all control descriptions in the same column and use the second column to identify the control type. All these options are set via the interface style.
You also can use the Highlight Priority command to highlight the records in the FMEA worksheet view based on the risk assessment ratings. Choose FMEA > Tools > Highlight Priority to toggle the priority highlights on and off. For more information about how to set up the priority highlights, refer to the Displaying RPN Metrics in the Analysis Panel topic.
When you are in the worksheet view, you can easily add records to the FMEA the same way that you do in the hierarchy view. For example, to add a new effect to the analysis, simply choose FMEA > FMEA Records > Effects. A new cell will appear in the worksheet in the Effect column with a blinking cursor and a Select Existing icon, as shown next, indicating that you are in edit mode.

Type the description for the record or click the Select Existing icon, which will open the Select Existing window. This window allows you to set the description by selecting from existing descriptions in the current database and/or from active phrase sets.
When you are in edit mode, you also can add new records to the analysis by pressing ENTER. For example, when you are editing an existing function, press ENTER to add a new function. A new function will be added to the next row in the Function column. You can add failures, effects, causes, controls and actions in the same manner.
When you are in edit mode:
Press TAB to navigate to the next column on the same row.
Press SHIFT+TAB to navigate to the previous column on the same row.
Press ENTER to navigate down to the next row. If you press ENTER from the last record in a column, the software prepares a new row so that you can create a new record.
To save your changes and exit the edit mode, press ALT. To exit the edit mode without saving your changes, press ESC. When a cell is selected and you are not in edit mode, use the arrow keys for navigation.
You also have the ability to copy/paste records in the worksheet view. To do this, make sure you are not in edit mode (i.e., the currently selected cell should not have a blinking cursor); you can save your changes and exit the edit mode by pressing ALT. Navigate to the record you wish to copy using the arrow keys. Copy the record by choosing Home > Clipboard > Copy or by pressing CTRL+C. Navigate to the record you want to paste under (e.g., if you are copying an effect, navigate to the failure you want to paste it to) and paste the record by choosing Home > Clipboard > Paste or by pressing CTRL+V.
To edit text fields in the worksheet view, double-click inside the cell to enter edit mode. You can use the HOME, END and arrow keys to move through the text in the cell. Make the desired modifications to the description or use the Select Existing window, then press ENTER or TAB or click somewhere outside of the cell to save the changes. To insert a line break within the cell, press CTRL+ENTER. When using the edit mode to work in a cell, if you want to copy and paste text, you can either use the keyboard shortcuts (CTRL+C and CTRL+V) or right-click and use the commands on the shortcut menu.
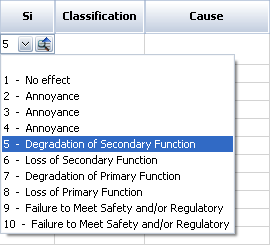
To edit a cell that contains a rating or a drop-down list (e.g., severity rating or classification), double-click the cell to display a list with the available options, as shown next.

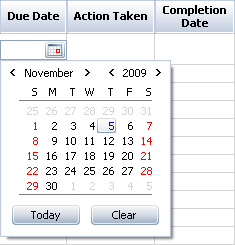
To edit a date field (e.g., target completion date, etc.), click the cell to display a calendar.

You also can click the cell again to type the date. You can enter the date in the format set in your region and language settings.
Note that the changes you make in most cells will be directly reflected in the relevant properties window.
Finally, to open a properties window, you can right-click any of the record columns and choose the Edit command from the shortcut menu that appears. You also can click the record column and choose the Edit command from the FMEA Records group of the FMEA tab of the Ribbon (e.g., FMEA > FMEA Records > Functions > Edit Function).
© 1992-2015. ReliaSoft Corporation. ALL RIGHTS RESERVED.