
| Related Topics: | ||
Use the Serialized page to view and manage serialized system configurations, which are based on generic system templates. For example, the template for Model A identifies all the parts that may be included in specific units. The serialized system identifies the parts that actually are included in a specific unit, including the unique serial numbers when applicable. Permissions required to access this page: Access Admin Tab and Manage Serialized Systems.
To open the page, choose System > System > Serialized.
![]()
If your implementation has more than one entity, the serialized systems must be configured separately for each. The drop-down list at the top of the page determines which entity's systems you are currently managing.
To create a serialized system, choose System > Serialized > Create System.
![]()
In the utility that appears, choose the kind of system you want to create from the Template Part drop-down list. Then enter the Serialized Part Properties.
To work with an existing serialized system, choose System > Serialized > Find System.
![]()
In the utility that appears, you can search by system serial number or by subsystem serial number.
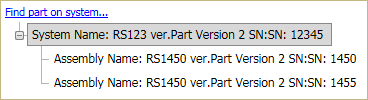
When you are creating or editing a serialized system, the system configuration is displayed on the left side of the interface. Click the plus (+) or minus (-) icons to expand or collapse a branch of the tree.
To locate a specific part, click the Find part on system link at the top of the hierarchy to search by part number or serial number.
If a part in the system configuration has been replaced, it will appear
at the bottom of the hierarchy and a replacement date will appear next
to it. Replaced parts are indicated by ![]() .
.
Once you have selected a system to work with, you can add new or existing parts to it and you can remove parts from the system.
Create Serialized - adds a part based on the generic system template and requires you to enter a unique serial number.
![]()
Add Existing Serialized - removes a part from another system and moves it to the current system.
![]()
Add Non-Serialized - adds a part based on the generic system template and does not require you to enter a unique serial number.
![]()
If you select the Associate Children check box, all children of each newly selected part will also be added to the list of selected items. Note that this can add a large number of parts and that, depending on the size of the tree underneath each selected part, the save process may take several minutes. To see a detailed view including child parts, click the View Structure link in the item hierarchy to open the full hierarchy in a new window.
Disassociate - removes the selected part from the system and makes it available for future use.
![]()
Delete Serialized - removes the selected part from the system, unless there are already records pertaining to the part, in which case the part is retired instead.
![]()
The Serial Number and Build Date are required for a system while only the Build Date is required for parts.
These characters are not allowed in serial numbers: @ # % & = { } " < >.
If the part has accumulated age before being added to the system (i.e., the part is "used"), specify the Starting Age (e.g., "Run Hours," "Number of Starts" or "kw Run Hours"). If you extract the data to Weibull++ or RGA for reliability analysis, the starting age may be added to the part's time on the system to estimate the part's time/usage. (For example, if the part had a starting age of 100 hours when it was added to the system, the system runs for 200 hours before the next failure and you have not directly specified the part's time/usage, we assume it is 300 hours.)
If you have configured additional detail fields to meet your organization's specific needs, they will be grouped together in a separate Details area.
© 1992-2018. HBM Prenscia Inc. ALL RIGHTS RESERVED.
 |
E-mail Link |