
This topic provides a general overview of the steps required to implement a web-based Synthesis Enterprise Portal for your organization.
When you are ready to configure a website, the print-ready implementation guide (*.pdf) provides more detailed instructions for each step.
The SEP is a web-based system based on the .NET Framework and is designed to be n-tier, scalable, distributable, robust and able to be deployed across multiple servers or on a single computer.
If you plan to host the database and website on the same server, you will need:
Windows 2008 R2 or Windows 2012 (Windows 2003 is not supported)
.NET 4.0
IIS with support for serving ASP.NET
SQL Server 2008 or newer OR Oracle 10g or newer (32-bit and 64-bit versions of all, full version only)
Once you have established the database and web server(s), a system administrator will need to:
Run the Synthesis Enterprise Portal setup to create the website.
Run the Product Activation tool to activate your SEP license.
Run the Synthesis Admin tool to either create a new Synthesis repository or connect to an existing one. You can also use this utility to create Synthesis Platform user accounts if desired.
Remember that ReliaSoft's XFRACAS, Synthesis desktop applications and the SEP website are all designed to connect with the same data repository. If you already have a database established, you can use the admin tool to integrate it with the SEP.
Once the Synthesis repository has been created, you can use the Synthesis Admin tool or any of the desktop applications to create Synthesis Platform user accounts and set access permissions. You must create an account for anyone who will be able to edit or view data in the Synthesis desktop applications or SEP website. (User accounts for the XFRACAS website are managed separately.)
If your organization uses Microsoft Active Directory, you can save time by importing user information from the directory to create the user accounts.
Once the Synthesis Platform user accounts have been created (via desktop application or the Admin tool), you can use the SEP website to specify which of the database users will have access to the web portal.
Click the SEP Admin link in the top-right corner of the website and then use the Select SEP Users section to specify which user accounts will have website access.
The counters above the user table identify how many more SEP users are allowed under your current license.


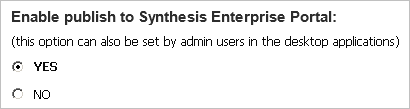
Some SEP-related features in Synthesis desktop applications (e.g., the ability to publish analysis summaries, workbooks, reports, etc.) will be visible only if the Enable publish to Synthesis Enterprise Portal option is set to "Yes" for the database.
This can be set from the SEP Admin page in the website or from the Repository Settings window in any of the desktop applications.
The optional "Custom Content" area in the SEP home page enables your organization to integrate a banner or other custom content into the site, if desired. This can be configured from the SEP Admin page in the website.
The SEPDefault.htm file is installed in the CustomContent folder under the root directory for the SEP website. You can choose to edit this file on the web server or replace it with a URL to another web page.
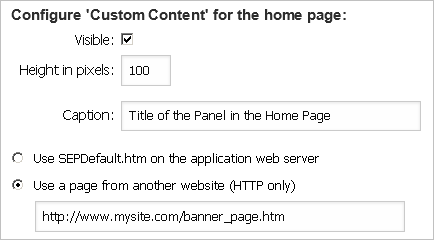
Note: If the content of the page is taller than the specified height in pixels, users with IOS devices will not be able to scroll.
When an SEP website is implemented for a Synthesis repository, the action alert e-mails and portal messages generated by any of the Synthesis applications can include links to view the action details in SEP. The applications build the links based on the settings specified on the SEP Admin page in the website. If an administrator has not specified an IIS prefix, the action alerts will not include links to SEP.
SEP Server - IIS Prefix: enter the server name and folder for the website that you see in the browser’s address bar (e.g., servername/SEP).
Website Uses SSL (https for URLs): select Yes if the web server has been configured with a Secure Socket Layer (SSL) certificate for the SEP website and the URLs need to start with https rather than http.
If these settings do not match your website configuration, the links attached to the action alerts will give an error message when users attempt to open the page in a web browser (e.g., "File or directory not found," "Access forbidden" or "This page can’t be displayed").
If your organization implements both the SEP and XFRACAS websites for the same enterprise repository, you can use the Admin Preferences page in XFRACAS (Admin > Configure > Preferences) to enable links between the two websites.
SEP → XFRACAS:
Specify the XFRACAS Server - IIS Prefix (e.g., servername/XFRACAS)
XFRACAS → SEP:
Specify the Synthesis Enterprise Portal Server - IIS Prefix (e.g., servername/SEP)
Set Synthesis - Display Synthesis Enterprise Portal (SEP) Command to True
Once the web portal has been implemented, users can access the site with any web browser that supports the following doctype. If the site is private (e.g., http://InternalServer/SEP), the system administrator may need to provide users with instructions for how to access the website on the internal network from their mobile devices (e.g., via VPN or some other method).
<!DOCTYPE html PUBLIC "-//W3C//DTD XHTML 1.0 Transitional//EN" "http://www.w3.org/TR/xhtml1/DTD/xhtml1-transitional.dtd">
© 1992-2017. HBM Prenscia Inc. ALL RIGHTS RESERVED.
 |
E-mail Link |