
 |
Related Topics: | |
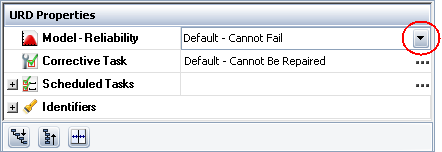
When you need to assign a model, you can click the field that requires the model as input and click the arrow that appears in the field, as shown next.
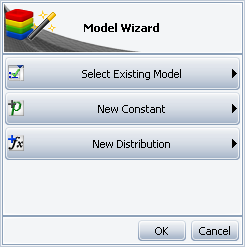
This opens the Model Wizard, which allows you to select an existing model or create a model on the fly; it retains your most recent settings so that you do not have to re-enter commonly used settings.
You do not have to specify the model category when you create a model using the Model Wizard; it is determined by where the model is used, as follows:
Models assigned directly to system hierarchy items are reliability models.
Models assigned directly to FMEA records (i.e., functions, failures or causes) are probability of failure models.
Models assigned to URDs (i.e., to a URD opened from the Resource Manager) are reliability models.
Models assigned to switches are reliability models.
Models used for task durations and for logistic delays associated with crews and spare part pools are duration models.
Models used by tasks, crews and spare part pools for costs that accrue over time are cost per unit time models.
Models used by tasks, crews and spare part pools for costs that arise on a per incident basis are cost models.
If you need to create a model of a different category, you must create the model via the Model window.
The Main page provides access to all available functions within the wizard. If a model has not been assigned in the field, you can select an existing model or create a new one.
If a resource has already been assigned, you can:
Select another existing model to replace the current model.
Create a duplicate of the current model and assign the new copy in the field (e.g., if you want to use the same/similar properties but remove the association with the original model that may be used in a different way elsewhere in the project).
View/edit the current model.
Remove the model from the current location (it will still be available for other records within the current project).

Most functions are also available as icons on the Select page of the wizard, which is the default view except when no model has yet been assigned. You can, however, always return to the Main page of the wizard by clicking the Back arrow in the bottom left corner of the Model Wizard.
The Select page provides a list of the models of the specified type that currently exist in the project. This is the default view once a model has been assigned, and can also be accessed by clicking the Select Existing button or icon.
![]()
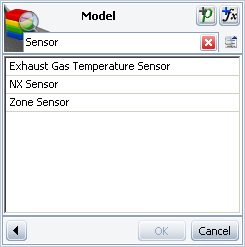
You can filter the models that are displayed in the list by entering text in the Filter field (marked with a magnifying glass); clear the filter by clicking the Clear Filter icon in the field (red x). Select a model and click OK (or double-click it) to assign the model to the current location. If a model was already assigned, the newly selected model will replace it.
You can click the Select Resource icon to open the Select Resource window, allowing you to select an existing model. The Select Resource window can display more resources (a maximum of 1,000 are shown in the wizard) and more information about each resource; in addition, it offers a wider range of filtering tools.
![]()
To create a new model from the wizard, click the New Constant or New Distribution button or icon.
![]()
![]()
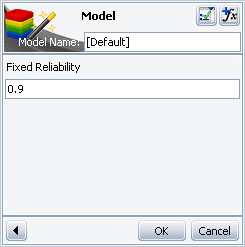
The New Constant page allows you to enter a fixed probability, duration or cost value for a constant model. The type of value that you enter is dependent upon the model category. For duration models and cost per unit time models, you will also need to enter the time units that the model uses.
The New Distribution page allows you to select the distribution and specify its parameters.

You can:
Select a distribution from the drop-down list and then enter the required parameters, which will vary depending on the selected distribution. (For a list of the available distributions and their required inputs, please refer to the Models topic.)
Use the Quick Parameter Estimator (QPE), which helps you to estimate the parameters of a distribution based on information you have about the reliability of a product, the probability of an event occurring or the typical duration of a task.
![]()
Once you have specified the properties for the new model, click OK to create the model and assign it to the current location.
Once you have created a given category of model via the Model Wizard, your settings for that kind of model will be retained and shown the next time you create that same kind of model. For example, the first time you create a reliability model, you will choose whether to create a constant model or a distribution model. If you create a distribution model, then the next time you go to create a reliability model, you will automatically see the options for a distribution model.
If a model has already been assigned and you wish to remove the association with the original model but use the same (or similar) properties for the current location, you can click the Duplicate button on the Main page of the wizard. The new copy will then be assigned in place of the original.
If a model has already been assigned, you can view and/or edit its properties in the Model window by clicking the View/Edit button or icon.
![]()
IMPORTANT: Any changes you make to the model will apply everywhere that the model is used throughout the project. This includes analyses in other Synthesis-enabled applications.
If a model has already been assigned, you can remove the model from the current location by clicking the Remove button or icon.
![]()
The model will still be available to be assigned to other records in the current project. If a model is not assigned to any other locations within the project and you want to completely remove it from the database, choose Project > Synthesis > Resource Manager.
© 1992-2013. ReliaSoft Corporation. ALL RIGHTS RESERVED.